
This tutorial describes how to create annotations which can be used to define a ROI (region of interest).
Suggested previous reading: Tissue Quantification.
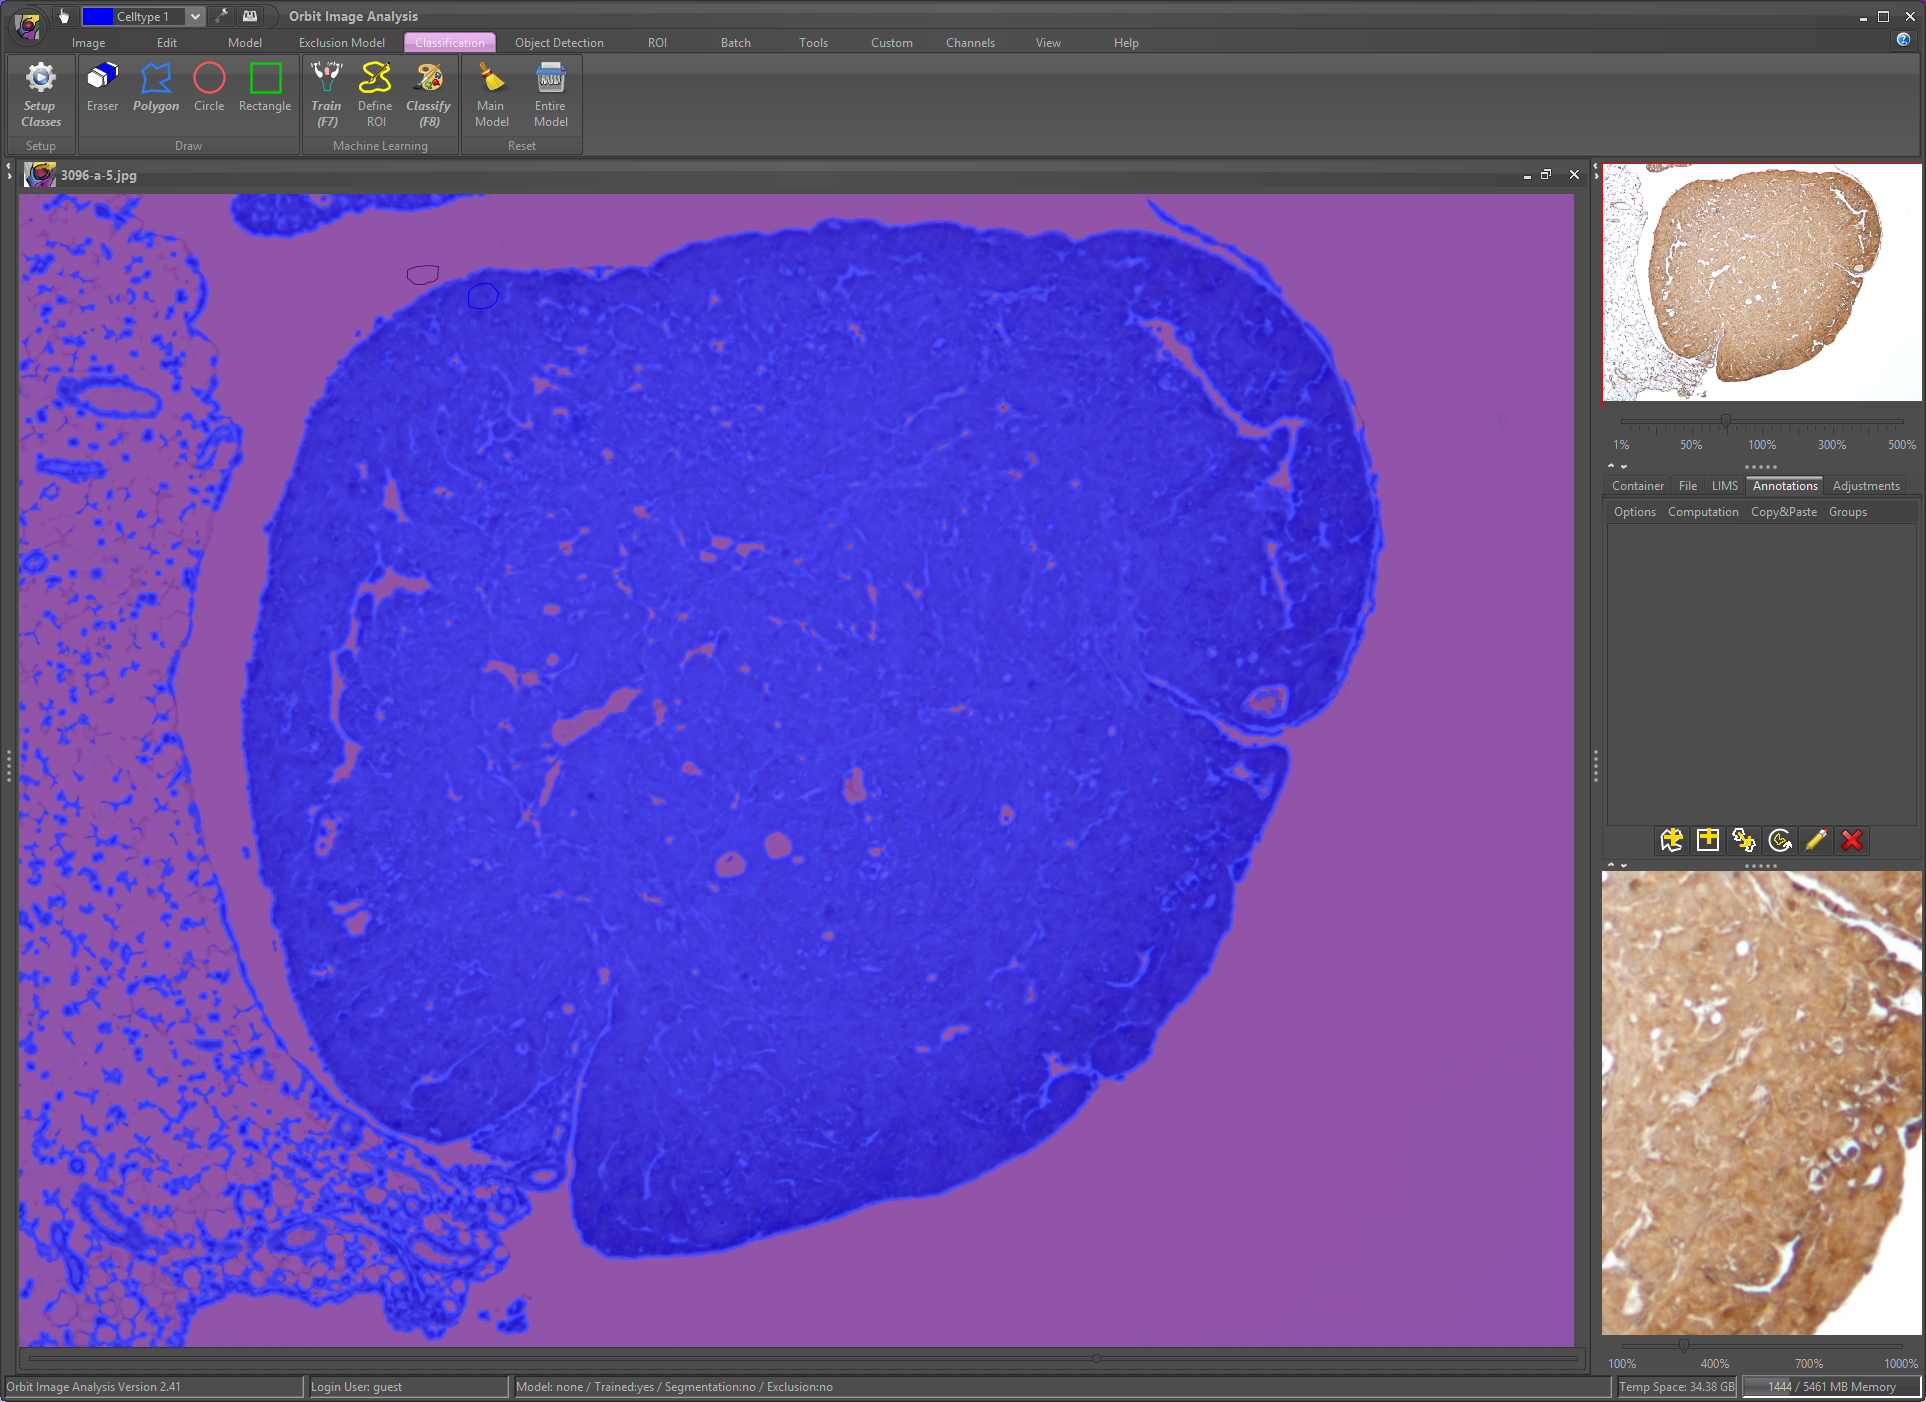
1) Let’s open a small image (so that we can classify the whole image in a short time) and create a classification model. After clicking on classify and dragging the classification-image slider to the right (bottom of the image), we see that Orbit classified the whole image, thus the ROI was our complete image.
2) Now in the annotation tab [1] on the right side click on the Polygon annotation [2] and draw an annotation inside the image [3]. When releasing the mouse the Polygon will be closed.
Then click on the annotation in the annotation list [4] and on the edit button (pencil) [5]. In the annotation properties set the type to ROI [6]. (A normal annotation is just a information with a description, but does not influence the ROI).
Now click on classify again [7]. You should get s.th. like the following image:
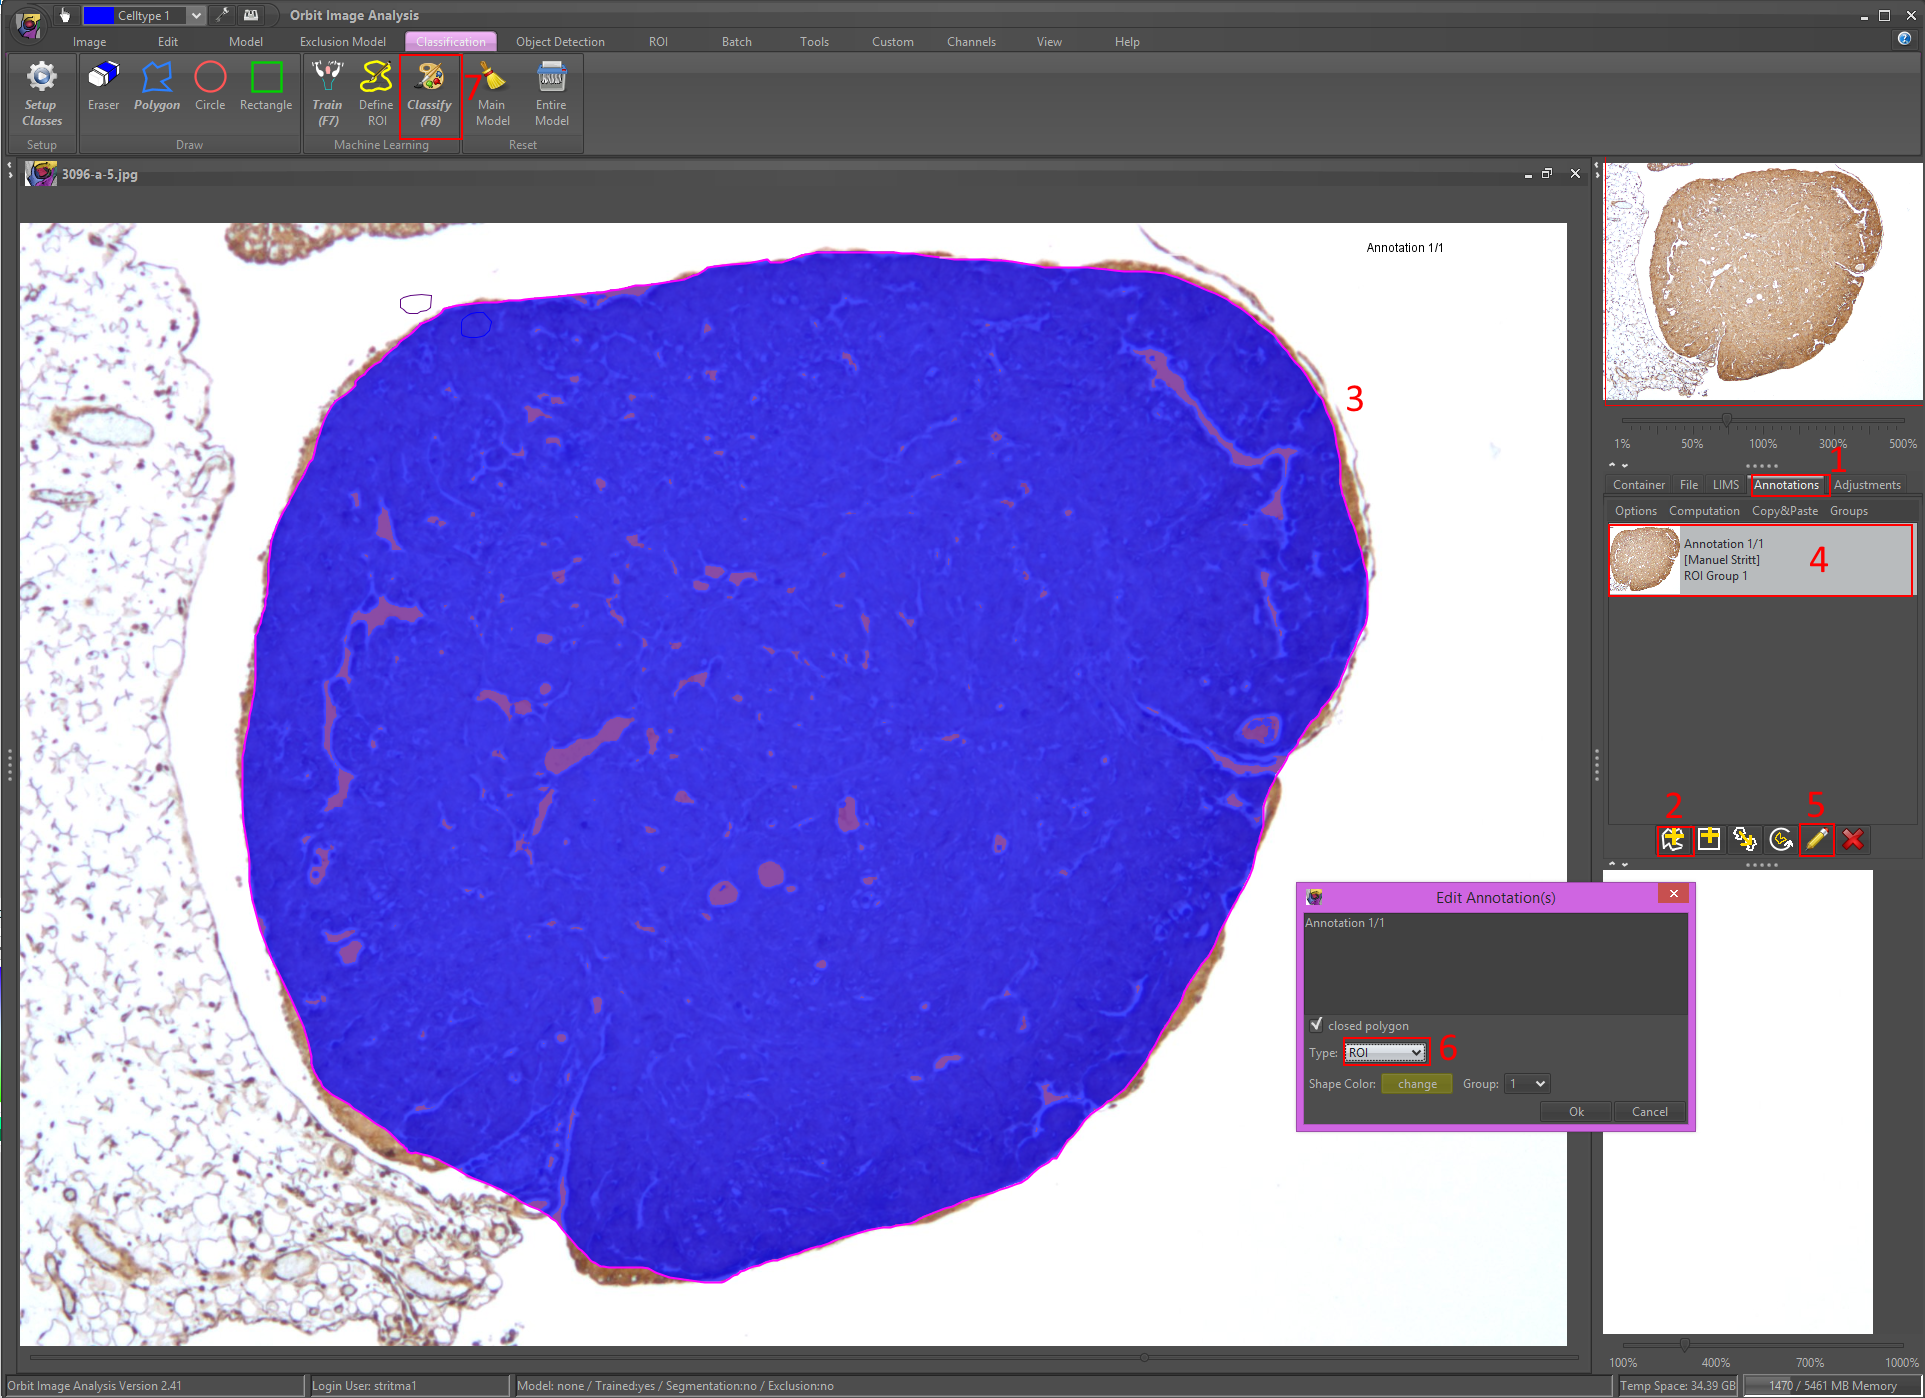
As you can see, we just defined a ROI by drawing an annotation. All annotations are stored in the Orbit database – either on an image server or inside the local file database. Whenever you open the image again, you will see the annotations. When using an image server, other people can see the annotation as well.
3) Now let’s assume we want to exclude an area inside our ROI. For that we draw another annotation inside our outer ROI. In the annotation properties, we set the type to exclusion this time. After classifying we see an exclusion inside our outer ROI.
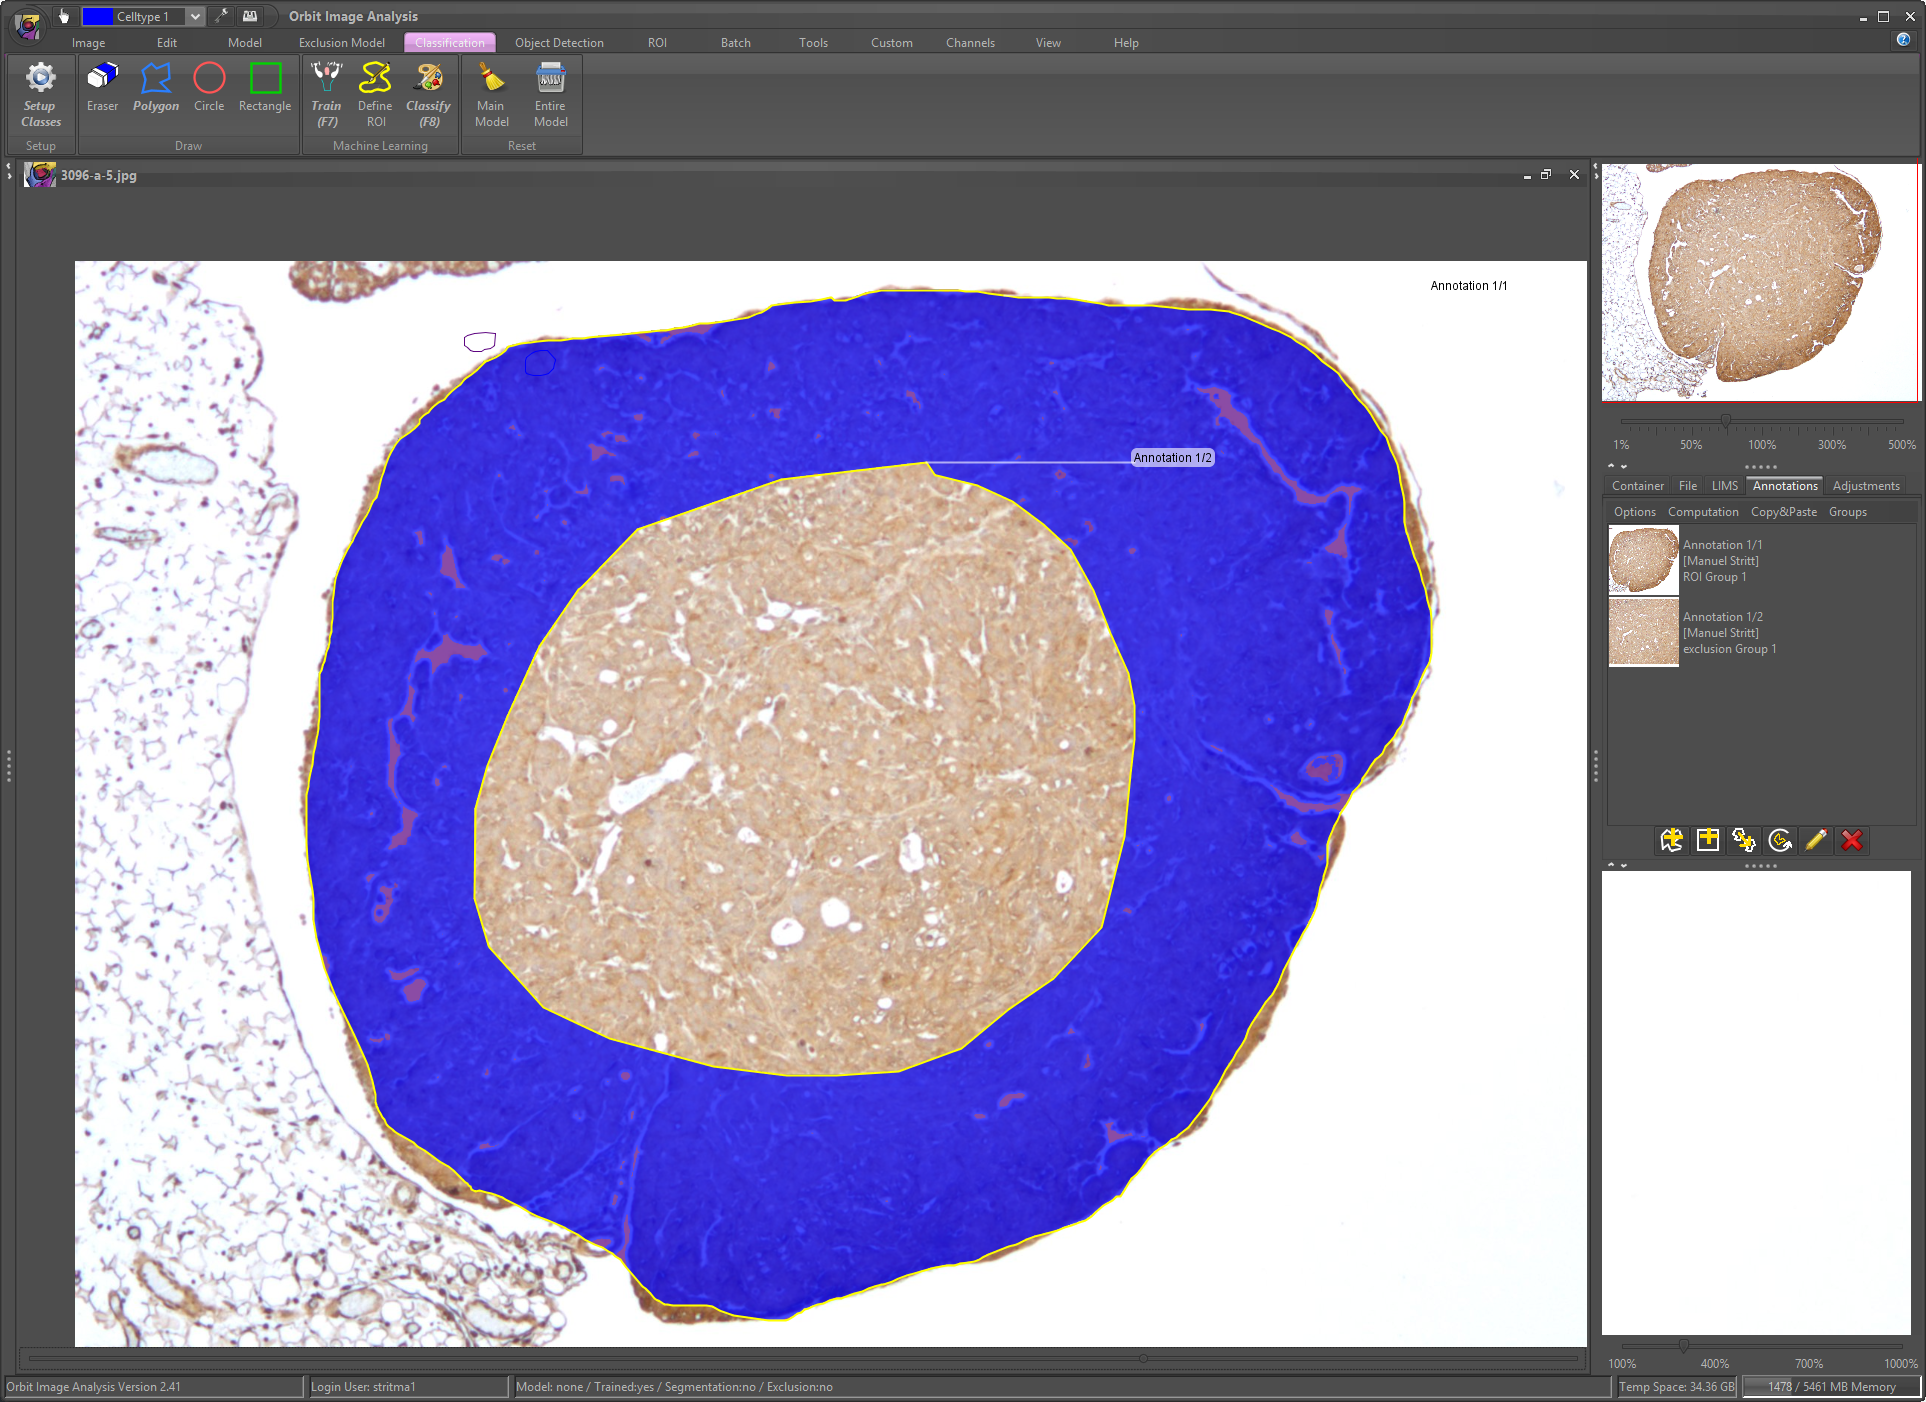
Now the valid ROI is just between our outer ROI annotation and the exclusion annotation. Only this area is used for classificaton, segmentation or object classification.
4) The last step now is to show how to include a part inside an exclusion annotation. For this we draw another annotation inside the exclusion part and set the type to inclusion. The result of the classification should be s.th. like this:
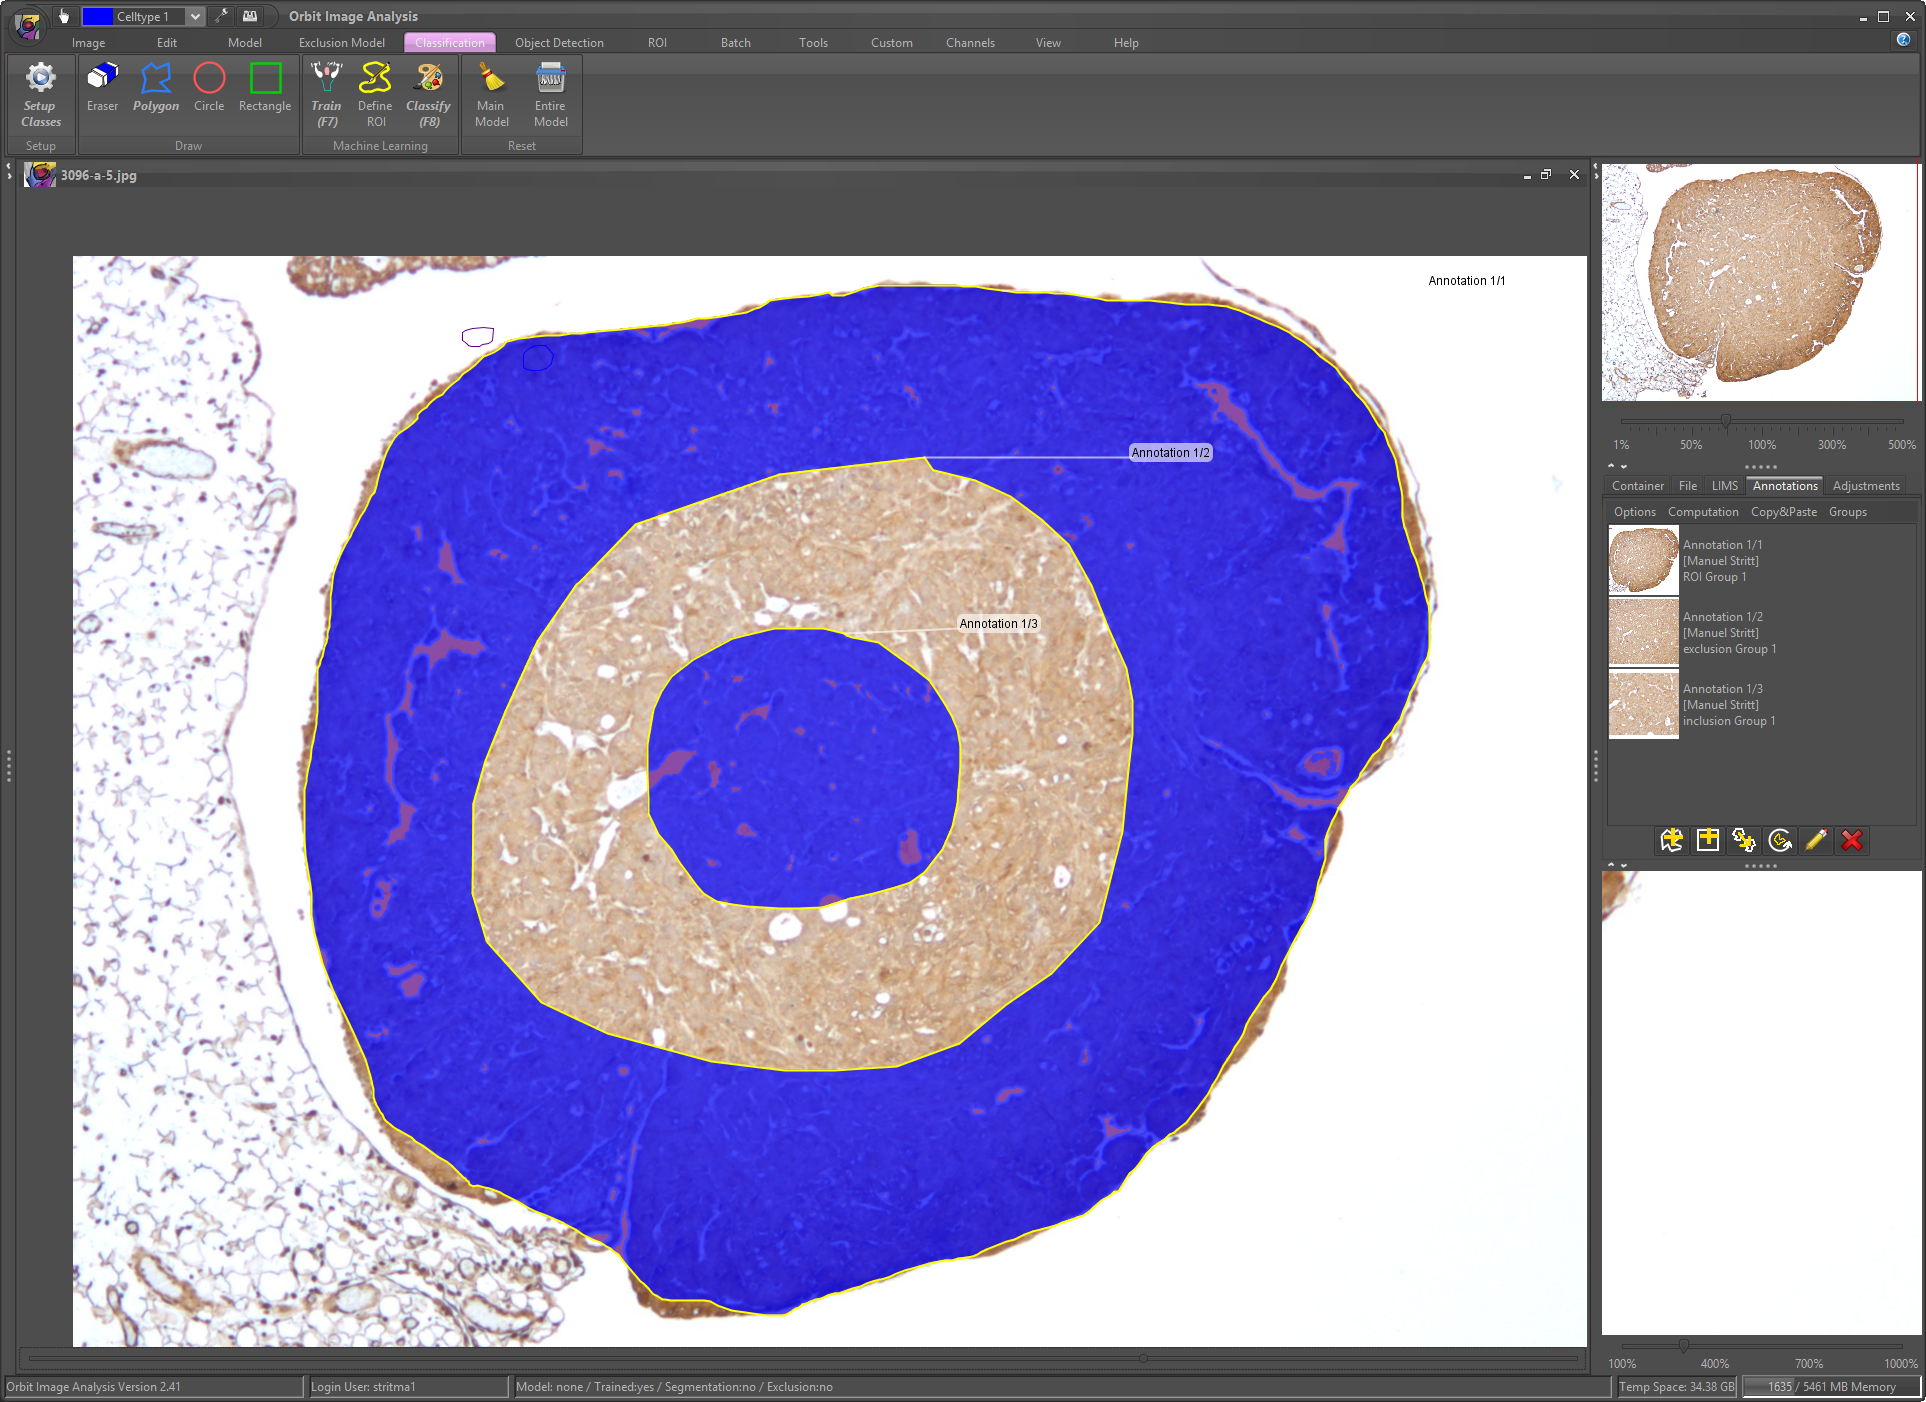
You can see that inclusion annotations have the highest priority and thus overrule exclusion annotations.
This annotation ROI technique is very powerful and be used in a collaborative way – e.g. one draws annotation, another one creates the classification model when using an image server.
Hint: You can combine several annotations to one. This is very helpful when drawing large annotations. For this first disable the closing of polygons: Option -> Close Annotation Polygon under the annotation tab. Draw several annotation parts. Now mark all parts in the annotation list and click on Option -> Combine Selected Polygons to merge the parts to one large annotation. You might want to open the annotation properties (pencil) of the newly created annotation and check the close polygon option.
Now you understand the basics of annotation ROIs. This technique can be combined with exclusion models. The idea is, that you can define a rough ROI in automated manner using an exclusion model and then e.g. exclude parts of it by manual drawn exclusion annotations. Annotations overrule the exclusion model logic.
Bonus: ROI Groups
You can define several ROI groups and then analyze these groups independent from each other.
To do so, select one or several annotations (ROI, exclusion, inclusion) and click on the edit tool (pencil button).
Then can you assign a group to the selected annotations.
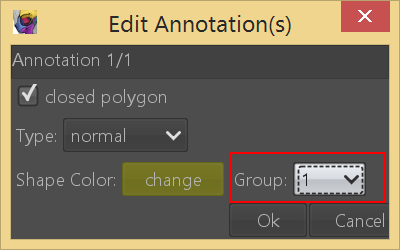
By default it’s group1, but you can select e.g. group2.
You can also set the default group for new annotations and which groups are visible in the Group menu of the annotation toolbox.
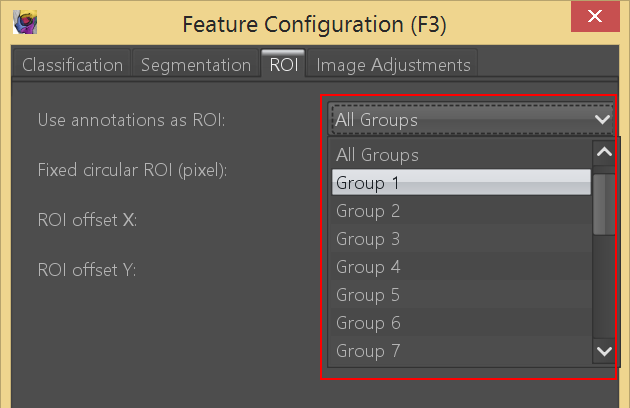
In the feature setup (F3), tab ROI, you can then select which ROI group should be analyzed. By default it’s all ROIs, but can be set to a specific one.
When you save a model the assigned ROI group is stored in the model. So always be sure that you enabled the correct ROI group in the model before starting an analysis.