This tutorial describes how to define a ROI (region of interest) by creating an exclusion model. In contrast to ROI annotations, this allows us the automated ROI creation using machine learning. This technique can be combined with manual drawn (e.g. exclusion) annotation.
Suggested previous reading: Tissue quantification, Annotations (ROI)
An exclusion model is created best when setting the image zoom so that you overview the whole image (e.g. use a small zoom factor).
It is strongly recommended to create exclusion models and fine grained models (e.g. classification or segmentation models) separately and then later combine them (when the fine grained model is active, use exclusion model -> load and set local/server).
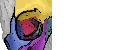
1) Open an example image, set the zoom so that you overview the whole image. In the Exclusion tab, click on setup classes [1]. This defined per default two inclusion and two exclusion classes which should be sufficient for most cases. (You can click on the class setup (F4) and define further inclusion / exclusion classes – be sure to set the type in the drop-down to inclusion or exclusion!).
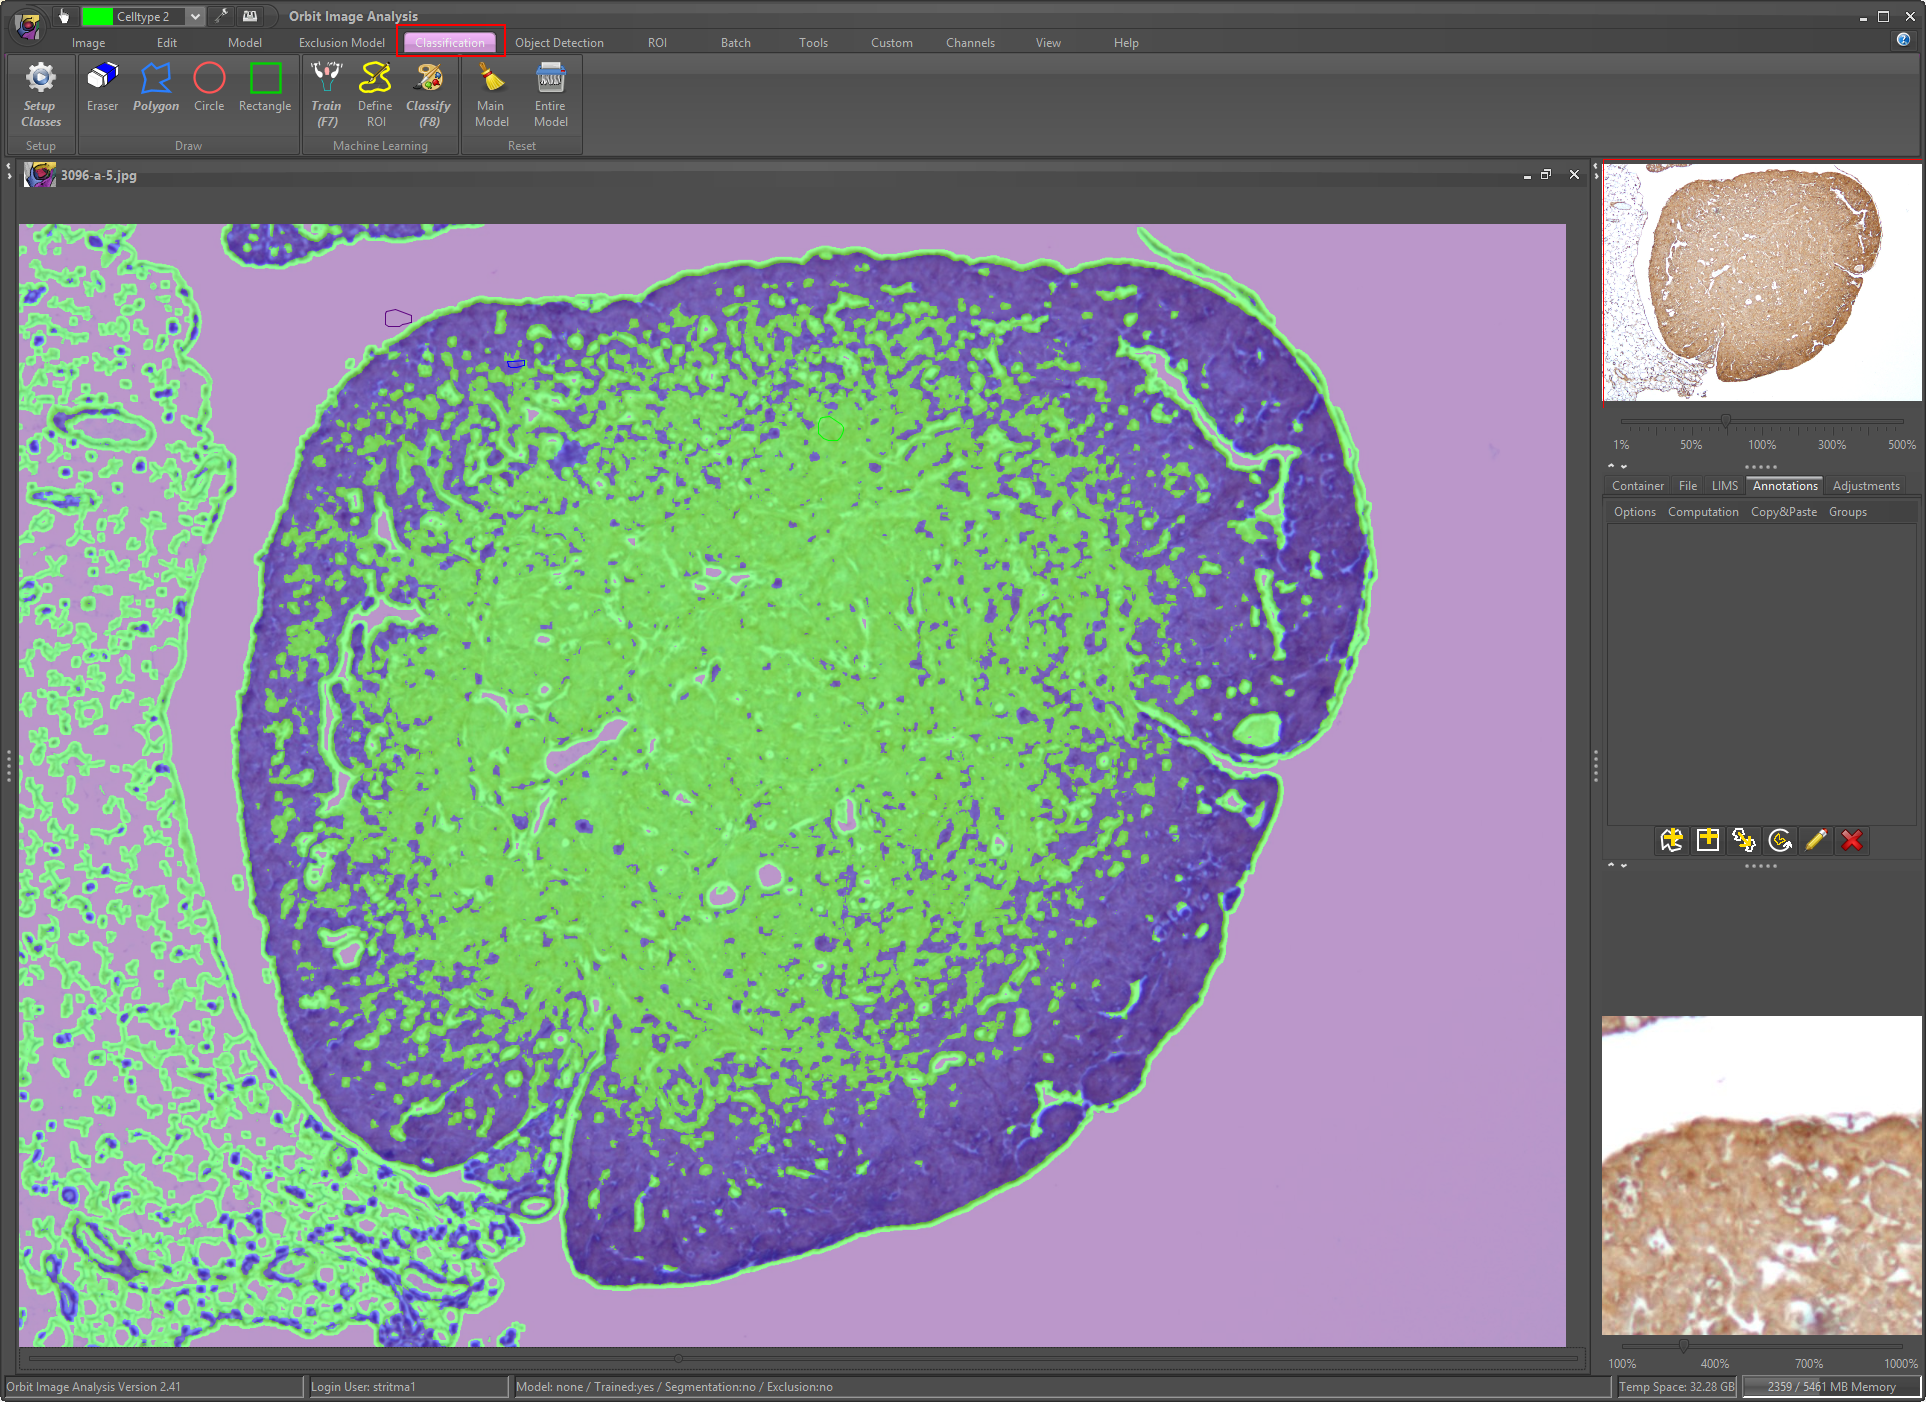
Select a class from the drop-down [2] and draw roughly representative regions per inclusion and exclusion class in your image [4, 5] using the Polygon tool [3]. You might just want to use one out of the two inclusion or exclusion classes and skip the other one. Then click on Train, Set and Classify [6] and draw the classification-image slider [7] on the bottom of your image.
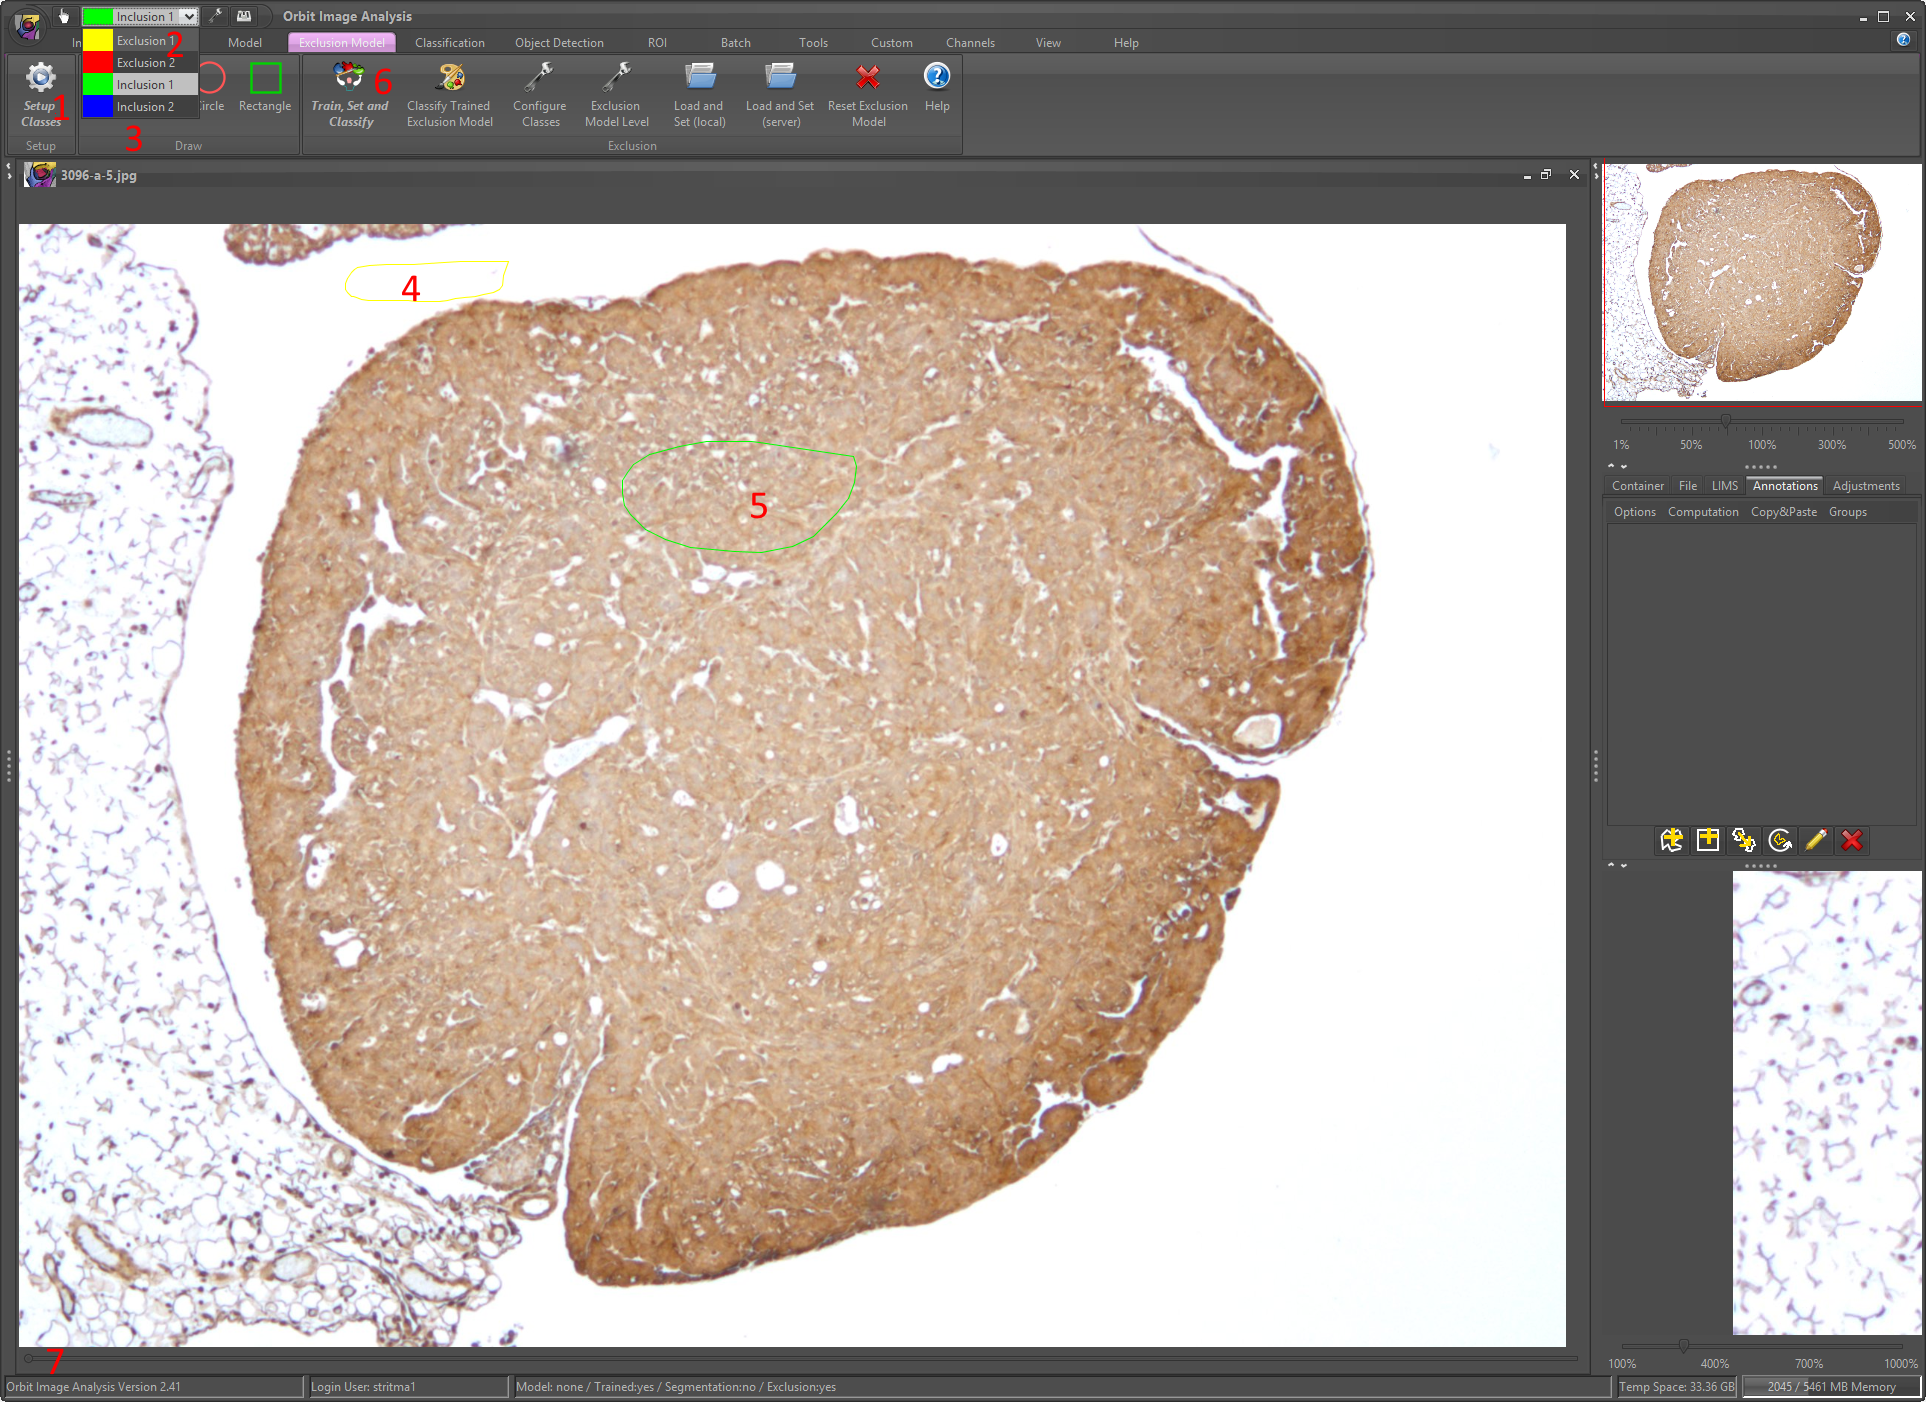
You see an overlay of what will be included (green and blue) and excluded (yellow and red).
You could go ahead and directly create a fine grained model, e.g. in the Classification tab click on setup classes and continue like normal (e.g. a tissue quantification). However, it is better to first save the model to disk (or on the server), then reset the complete model, create a fine grained model and later add the exclusion model to the fine grained model. This allows us to create both models independently and makes it easier to exchange one or the other at a later point of time.
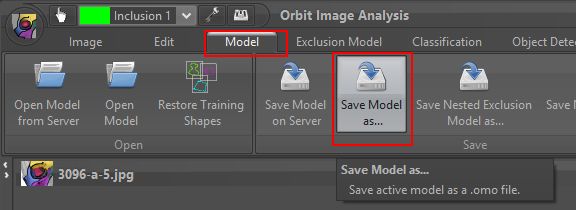
For this reason we click on Model -> Save model (on disk or server). Here we store it on disk and and write “-exclusion” in the filename.
Now we reset the complete model…

…and create a fine-grained model, e.g. like described in the tissue quantification tutorial. In short: Classify -> Setup Classes, draw shapes for each class, click on train, click on classify, check the model using the classification-image slider (bottom of the image).
The difference between a fine grained classification model and the exclusion model is that the fine grained model is performed on the full resolution of the image whereas an exclusion model is performed on a very low resolution of the image and then scaled up to the full resolution. Thus, a exclusion model is much faster.
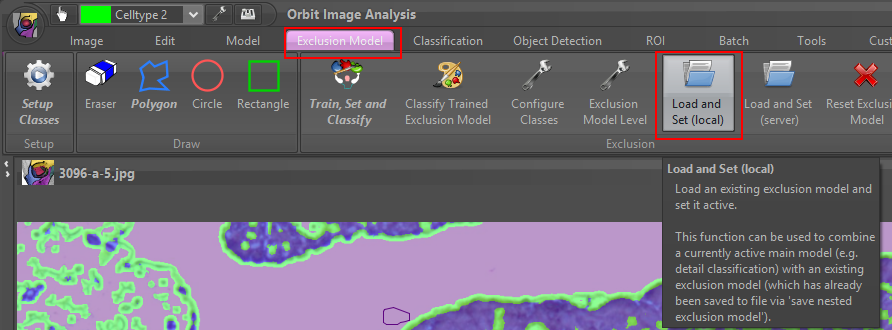
Now we click on Exclusion Model -> Load and Set (local) (or server, of you saved the exclusion model on server before) and load the previously created exclusion model.
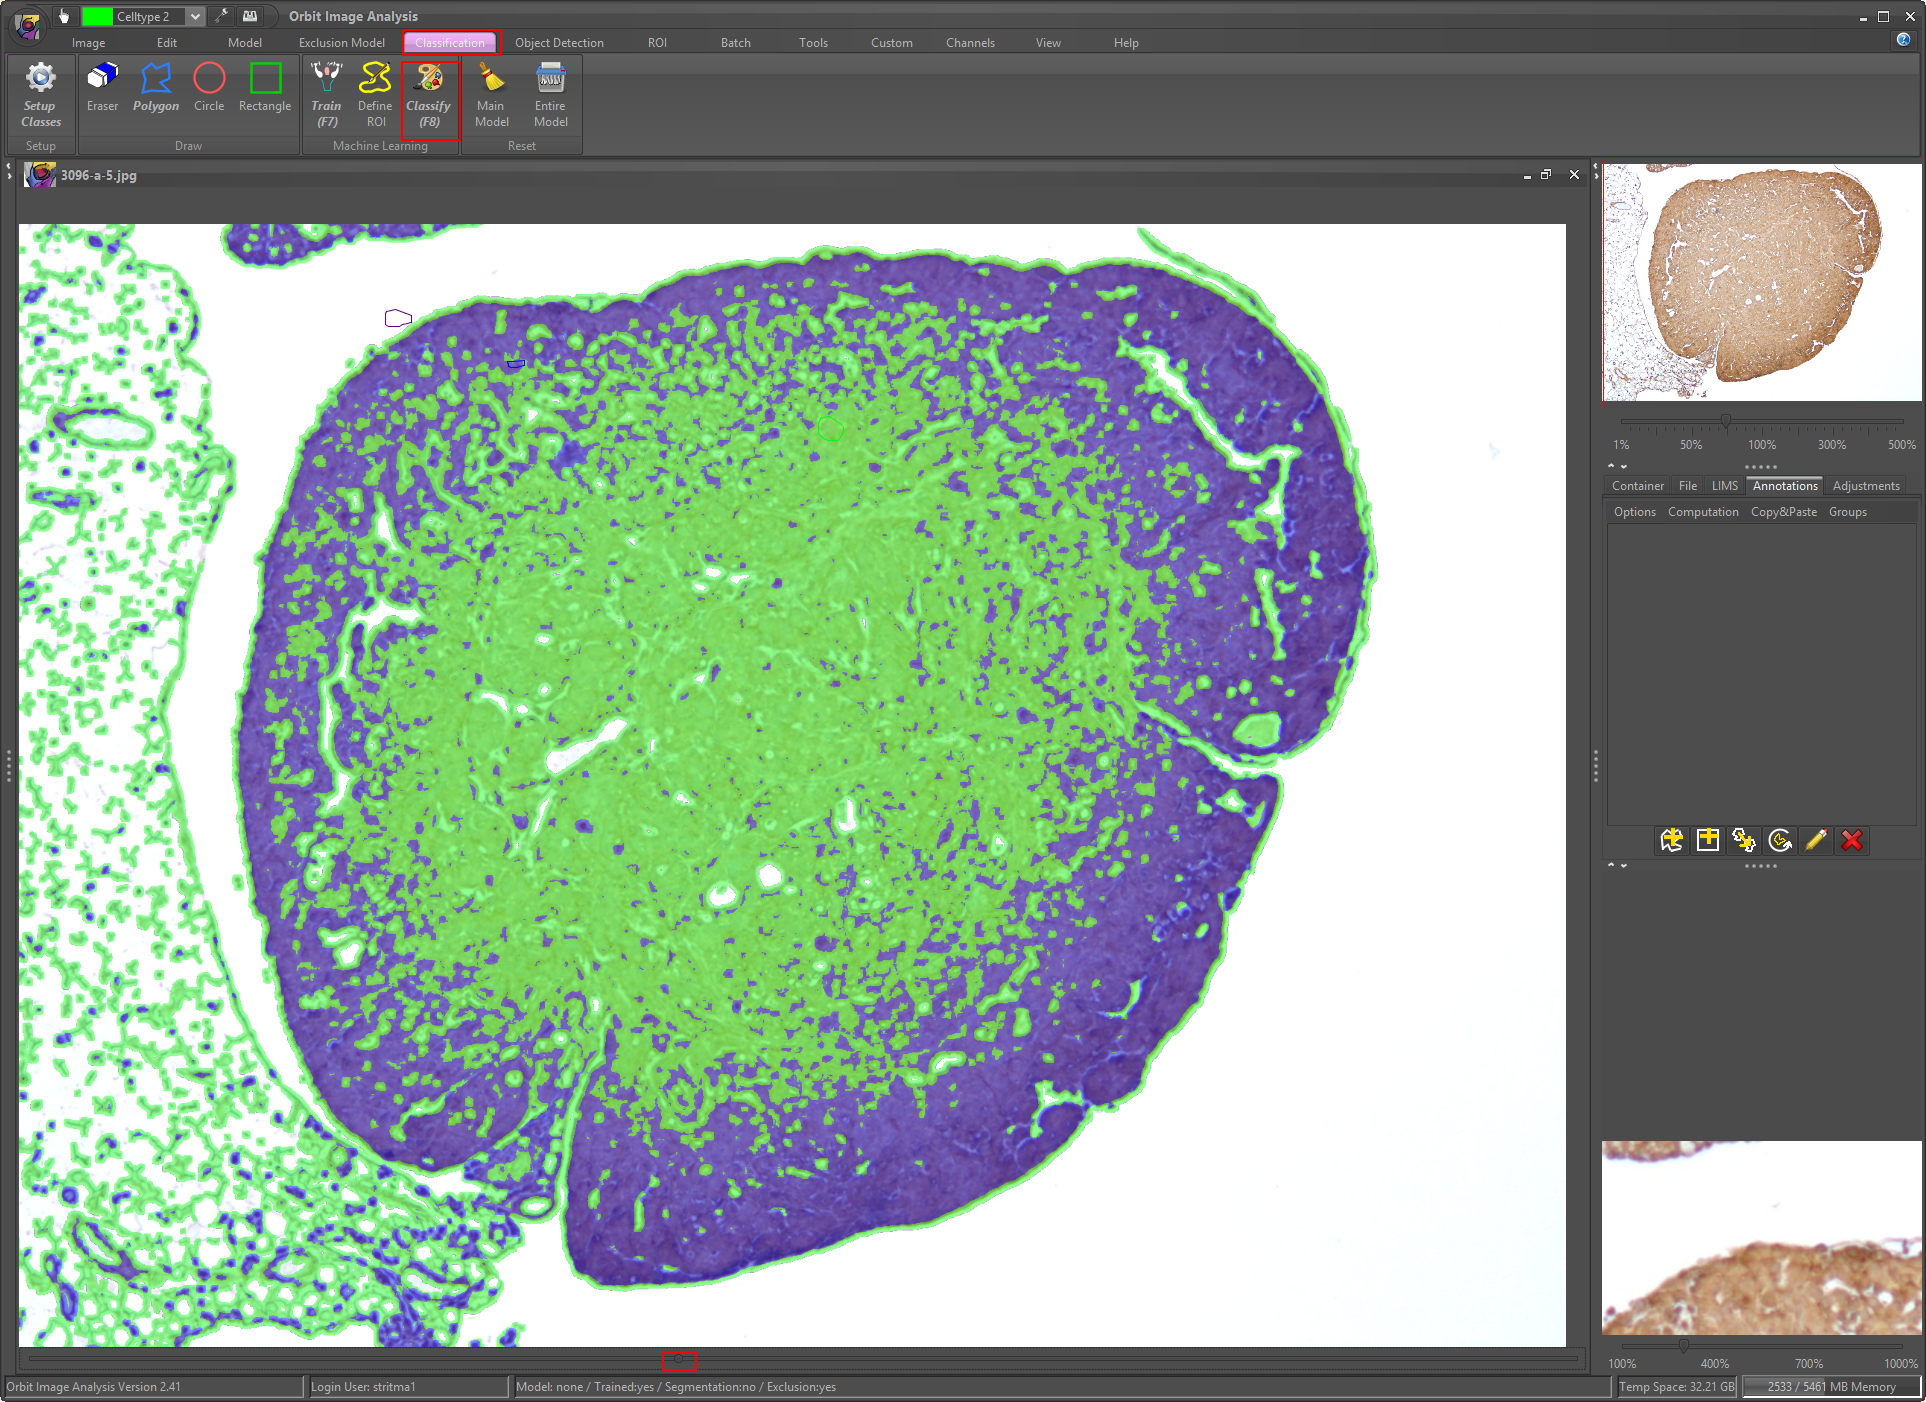
This embeds the exclusion model (which defines our ROI) inside the fine grained model. You can see in the status bar, that we have both, a trained model and an exclusion model.
![]()
Now go back to the Classification tab and click on Classify. You should see that only the region inside the valid ROI is classified by the fine grained model.
This technique allows us to perform quantifications inside a valid ROI, e.g. to exclude background. This is helpful because it speeds up the quantification a lot (all background is ignored) and in addition when performing a count-based quantification (e.g. object segmentation) the counts can be normalized to the size of the ROI.
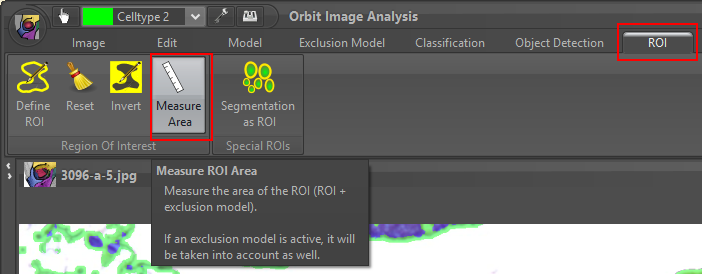
The size of the ROI can be computed by clicking on ROI -> Measure Area. In Batch mode, an additional column specifying the ROI area is reported.
You can combine an exclusion model with manual annotations, e.g. draw a manual annotation of type exclusion, click on classify again and see what happens. You can overrule the exclusion model ROI.
Congratulations, you now understood (or at least read) the advanced exclusion model technique!